Valentine's Day, Vegan

Vegan Brownies

February 10, 2014

Vegan Chocolate Brownies // bakeaholic.ca

This Friday is Valentine’s Day – which means everyone is making reservations and plans to show their loved one just how much they love them. Adam and I haven’t gone ‘out out’ for Valentine’s Day for a few years now. I can’t remember our last real Valentine’s day dinner at a restaurant. This year, we’re opting to stay in again just the two of us. 

Often when we go out for dinner we find something about the service or food that isn’t impressive, which leads us to end the night asking “remind me again why we even go out?” Usually the argument is that I can make better food at home, for a fraction of the dine-out price. Especially when it’s for something special like a birthday or Valentine’s Day.

Every Valentine’s Day we also watch Valentine’s Day the movie – you know the one with Ashton Kutcher where it follows different love stories. It’s cheesy, but necessary. Last year we had a small chocolate fondue for two including homemade marshmallows (peanut butter or regular), and assorted fruit. It was casual and perfect. Exactly how we like to spend our time together. 

So, if you’re into staying at home with your boyfriend/girlfriend/significant other this Friday night I suggest a cozy casual dinner for two, a movie cuddled on the couch followed by these individual / share vegan brownie pots. They’re rich, indulgent and the perfect ending to a Valentine’s Day night. 

Vegan Chocolate Brownies // bakeaholic.ca

Vegan Chocolate Brownies // bakeaholic.ca

I topped the brownies with coconut whipped cream. I found coconut cream at Trader Joe’s and simply placed it in the fridge overnight, then beat in a medium bowl it until fluffy. I also suggest serving some raspberry coulis on top (simply microwave 1/2 cup of frozen raspberries until hot and spoon over top of the coconut cream)

Some fun Valentine’s Day movies to watch:

  • When Harry Met Sally
  • Valentine’s Day
  • Pretty Woman
  • Pride & Prejudice
  • Sleepless in Seattle
  • You’ve got Mail
  • Dirty Dancing
  • Shakespeare in Love

I’m thinking we might order in sushi for Valentine’s Day this year. And these brownie pots.

Vegan Brownies
Dense, fudgey Vegan Brownies. You can make them in individual ramekins or in a 8x8 baking dish.
Write a review
Print
Ingredients
  1. 1/2 cup Vegetable oil
  2. 3/4 cup Sugar
  3. Splash of Vanilla
  4. 1/2 cup Unsweetened Cocoa
  5. 1/2 cup Unsweetened Applesauce
  6. 2-3 oz. Dark Chocolate chocolate, melted
  7. 1 1/2 cups Flour
Instructions
  1. 1. Preheat oven to 350 degrees.
  2. 2. Whisk together the vegetable oil, sugar and vanilla in medium bowl.
  3. 3. Sift in the cocoa, and add the applesauce. Whisk again.
  4. 4. Pour in the melted chocolate and whisk until smooth.
  5. 5. Slowly stir in flour until completely incorporated.
  6. 6. You can either divide the batter evenly into 4-5 ramekins, or place in a 8x8 square baking dish. Be sure to grease both beforehand. Pour batter into prepared ramekins or baking dish and bake 20-25 minutes. Be careful not to over bake.
  7. Serve warm with coconut cream and raspberry coulis.
Notes
  1. Keep on countertop for up to a week, covered.
b a k e a h o l i c https://www.bakeaholic.ca/
Valentine's Day, Vegan, Wheat Free

Wheat-Free & Vegan Graham Crackers

February 7, 2014

grhma

graham It’s Friday! That means two things: The Winter Olympics are starting today! (official opening ceremony) and, it’s the long weekend!!

To continue my ‘foods that go together naturally’ for Valentine’s Day theme I made some crisp, lightly spiced Vegan Wheat Free Graham Crackers to go with my Peanut Butter Marshmallows. Because, Marshmallows and Graham Crackers go together naturally – they’re just better together. 

I made this same recipe last year for Valentine’s Day (Marshmallows + Graham Crackers) only this time I used Oh She Glow’s Vegan and Wheat Free Graham Cracker recipe. The crackers are so good. So good in fact I had a few for dessert last night on their own, and a couple with breakfast today.

They’re a perfect snack food, or you can incorporate them into an after dinner dessert.  They would be great to share with a Valentine – wrap them up with a big fluffy marshmallow, a few squares of chocolate and two crackers for S’more Love. 

hgrgrhm'   

Wheat Free & Vegan Graham Crackers
Yields 24
Lightly spiced and crisp, wheat-free and vegan graham crackers perfect for snacking, or making into s'mores
Write a review
Print
Wet Ingredients
  1. 3 tablespoons Melted Coconut Oil
  2. 3 tablespoons Molasses
  3. 4 tablespoons Almond Milk
  4. 2 tablespoons Agave Syrup
  5. 1/2 tablespoon Ground Flax
Dry Ingredients
  1. 3/4 cup Quinoa Flour
  2. 1 + 1/2 cup Gluten-Free Rolled Oats, processed into a flour
  3. 5 tablespoons Brown Rice Flour or Coconut Flour
  4. 2 tablespoons Organic Cane Sugar
  5. 1/2 teaspoon baking soda
  6. dash of cinnamon
  7. dash of ginger
  8. dash of nutmeg
Directions
  1. Preheat the oven to 350F and line a large baking sheet with parchment paper.
  2. In a small bowl, whisk together all the wet ingredients.
  3. Add the rolled oats to a food processor and process until fine flour forms.
  4. Add the rest of the Dry ingredients to the food processor and process for 30 seconds.
  5. Add the wet mixture to the food processor and pulse until dough begins to form.
  6. Form the dough into 2-3 balls and place one at a time on a lightly floured non-stick mat. Lightly flour a rolling pin (if necessary) and begin rolling out the dough until you have a rectangle that is about 1/8 inch thick. The dough will crack a bit, but continue working with it until it forms together.
  7. Use a rectangular/square cookie cutter to cut the graham crackers. A pizza slicer will also work. Carefully transfer to prepared baking pan (I just removed the scraps and used the sheet I had rolled them out onto to bake them on)
  8. Poke each cracker with the tines of a fork.
  9. Bake for 8 minutes and then remove from oven and carefully flip each cracker over. Return to the oven for 6 minutes longer, until golden. Allow to cool for a minute before transferring to cooling rack.
Adapted from Oh She Glows
b a k e a h o l i c https://www.bakeaholic.ca/
Dairy-Free, Dessert, Valentine's Day, Wheat Free

Peanut Butter Marshmallows

February 5, 2014

nnv

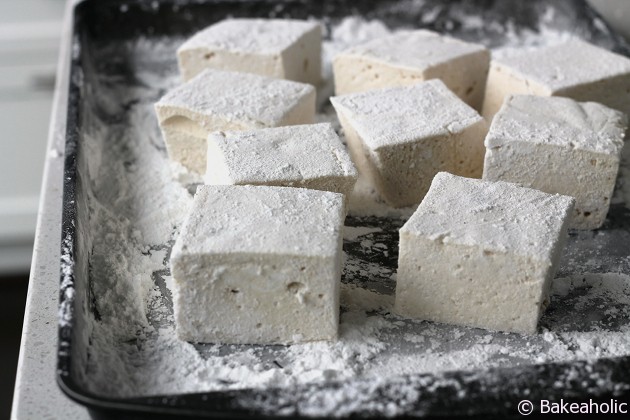
There must be something about February and Marshmallows – because this time last year I made marshmallows for the first time ever for Valentine’s Day. 

Maybe because you can make them into delicious s’mores – or quinoa rice crispy squares. Which are one of my favourite treats – the combination of marshmallow, chocolate and a graham cracker crunch seems perfect. 

In October I received a copy of Butter Baked Goods cookbook and made her Gingerstamp cookies. Of course I would have to try the famous Butter Marshmallow recipe at some point too – as it is one of the most popular menu items. 

When I first made Marshmallow’s last year I wasn’t sure how they would turn out – it seemed simple enough but I was a little intimidated. This time, I was super excited to make them again and they turned out even better than I had remembered. 

I had to try a different flavour this time around – Peanut Butter. 

One of my faaaavourriteee nut butters is Peanut Butter. And a Peanut Butter Marshmallow sounded pretty good to me. 

If you’ve never made marshmallows before, I highly suggest you give it a try. It might sound scary (making the boiling sugar) but this recipe makes it really simple – just bring to a boil, then remove from heat. 

You can package these up in a pretty cellophane bag and tie with a big ribbon to drop off to your friends or loved one for a Valentine’s Day. Maybe pack some chocolate and a few graham crackers too 😉

marshmallowpnbsvf mngfmmmm

mbmn

Peanut Butter Marshmallows
Thick Fluffy Peanut Butter Marshmallows
Write a review
Print
Ingredients
  1. 1 cup water
  2. 3 envelopes unflavored gelatin
  3. 2 cups granulated sugar
  4. 1⁄2 cup light corn syrup
  5. 1/2 cup creamy natural peanut butter
  6. 2 tablespoons pure vanilla
  7. Generous amount of icing sugar to coat the marshmallows, about 2 cups
Instructions
  1. Grease a 9x9 baking dish. Set aside.
  2. STEP 1 : In a stand mixer fitted with a whisk attachment, pour in 1⁄2 cup of the water and sprinkle with the gelatin. Set aside to allow the gelatin to soak in.
  3. STEP 2 : In a medium saucepan over high heat, add the sugar, corn syrup, salt and remaining 1⁄2 cup of water. Bring to a rolling boil and continue to boil for 1 minute. Remove from the heat.
  4. STEP 3 : Turn the mixer to low and mix the gelatin once or twice to combine it with the water. Slowly add the hot sugar mixture, pouring it gently down the side of the bowl, and continue to mix on low.
  5. NOTE : Be really careful at this point because the sugar mixture is smoking hot! It’s not a job for little ones.
  6. STEP 4 : Turn the mixer to high and continue to whip for 10 to 12 minutes until the marshmallow batter almost triples in size and becomes very thick. Scrape down the sides of the bowl frequently to avoid the batter overflowing as it grows. Stop the mixer, add the vanilla and Peanut Butter and then whip briefly to combine.
  7. STEP 5 : Transfer the mixture to the prepared baking pan and use a spatula or bench scraper to spread it evenly in the pan. Work quickly, as the marshmallow becomes more difficult to manipulate as it sets.
  8. STEP 6 : Grease a sheet of plastic wrap with butter and lay it across the top of the marshmallow. Press down firmly on the plastic wrap, to seal it smoothly and tightly against the mixture.
  9. STEP 7 : Leave the marshmallow to set at room temperature for at least 4 hours or, even better, overnight. The marshmallow will be too sticky and soft to cut if you try too soon.
  10. STEP 8 : Sprinkle a work surface or cutting board with the icing sugar. Run a knife along the top edge of the pan to loosen the marsh­mallow slab. Invert the pan and flip the marshmallow out onto the counter or board. Scoop up handfuls of the icing sugar and rub all over the marshmallow slab.
  11. STEP 9 : Use a large knife to cut the slab into 1- × 1-inch squares. Roll each of the freshly cut marshmallow squares in the remaining icing sugar to coat them completely.
Notes
  1. These are so much better than store bought - and you can actually freeze them if you wish.
Adapted from Rosie Daykin
b a k e a h o l i c https://www.bakeaholic.ca/